Unity の Project TCC を触って、Unity の機能を学んでいきましょう。
Project TCC で遊ぼう~UC-01-01 Walk: キャラクターを歩行させる~
Project TCC
TCC は Tiny Character Controller の略ということですが、小さなコンポーネントを組み合わせてゲームを作っていくシステムになっています。
下記のサイトからダウンロードして遊んでいきましょう。
UC-01-01_Walk
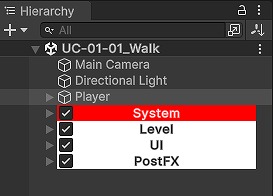
UC-01-01_Walk シーンを開きます。
Unityエディター上で再生すると、ユニティちゃんを歩かせることが出来ます。
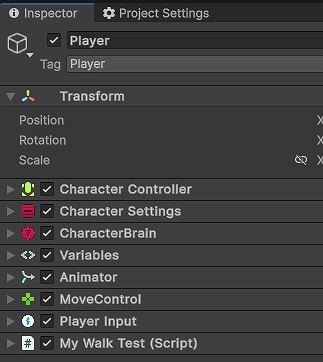
ヒエラルキーの Player オブジェクトを選択します。
インスペクターを見ると、たくさんのコンポーネントが付いていることが分かります。
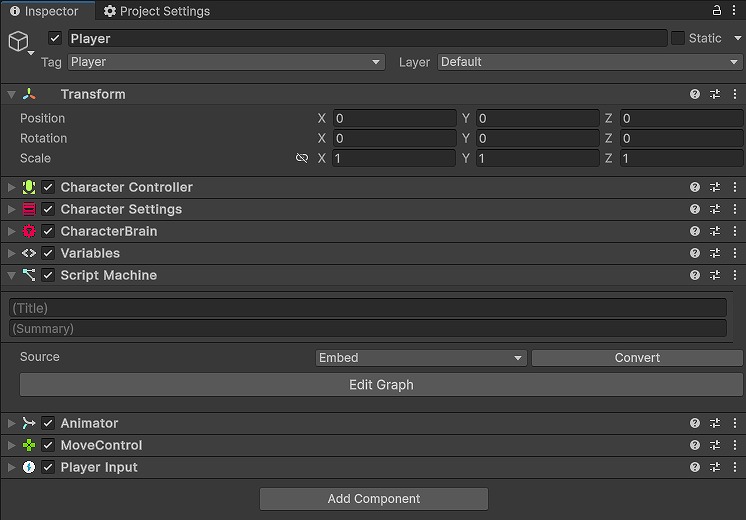
Script Machine コンポーネントは、Visual Scripting でコード無しで動かすことが出来るようになっています。
今回は、Visual Scripting でプログラミングされている個所を、コードに変換して行きたいと思います。
Visual Scripting からコードに変換する
シーンの複製
まずは、シーンをコピーして、コピーしたシーンを編集していきます。
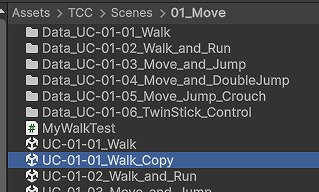
UC-01-01_Walk シーンを選択して Ctrl+D で複製します。
複製したシーンの名前を適当に変更します。(ここでは UC-01-01_Walk_Copy にしました)
Visual Scripting の確認
Player オブジェクトについている Script Machine コンポーネントの Edit Graph ボタンを押します。
Visual Scripting で作成されたプログラムを確認することが出来ます。
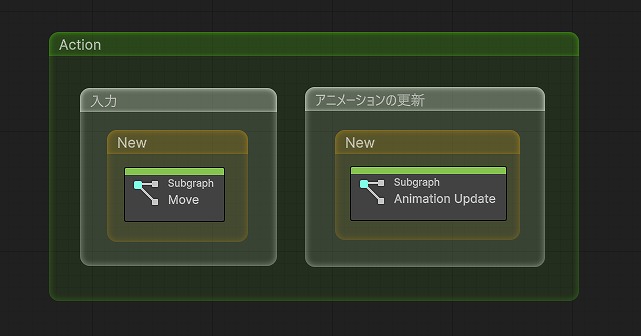
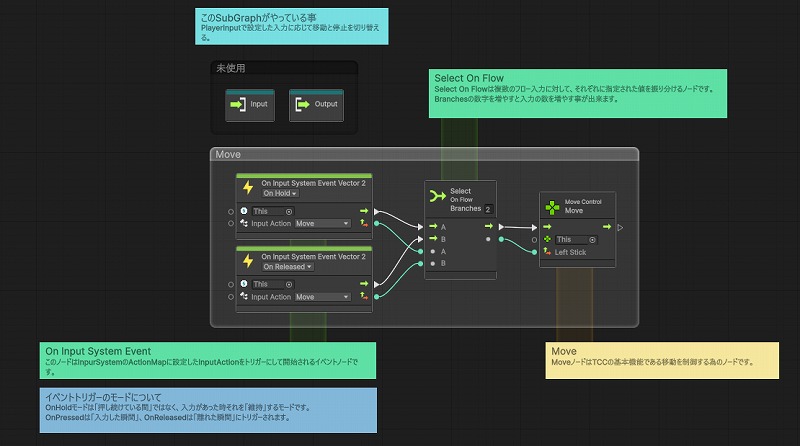
キャラクターを移動させる処理はこちらになります。
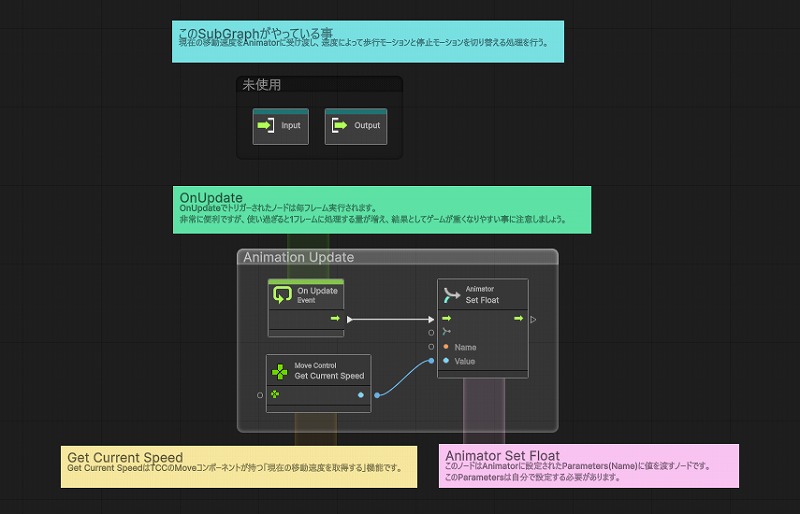
アニメーションの設定はこちらになります。
C# スクリプトの作成
今回は、Visual Scripting を使わないので、Player オブジェクトの Script Machine コンポーネントを Remove Component します。
そして、C# スクリプトを作成して、Player オブジェクトにくっ付けます。
C# スクリプトの名前は MyWalkTest にしました。
MyWalkTest の内容はこちらになります。
using Unity.TinyCharacterController.Control;
using UnityEngine;
using UnityEngine.InputSystem;

public class MyWalkTest : MonoBehaviour {
    private MoveControl m_rMoveControl;
    private Animator m_rAnimator;
    private PlayerInput m_rPlayerInput;
    private InputAction m_rMove;

    void Awake() {
        TryGetComponent<MoveControl>(out m_rMoveControl);
        TryGetComponent<Animator>(out m_rAnimator);
        TryGetComponent<PlayerInput>(out m_rPlayerInput);
        if (m_rPlayerInput != null) {
            m_rMove = m_rPlayerInput.actions["Move"];
        }
    }

    private void OnEnable() {
        if (m_rPlayerInput != null) {
            m_rMove.performed += OnMove;
            m_rMove.canceled += OnMoveStop;
        }
    }

    private void OnDisable() {
        if (m_rPlayerInput != null) {
            m_rMove.performed -= OnMove;
            m_rMove.canceled -= OnMoveStop;
        }
    }

    private void Update() {
        if (m_rMoveControl != null) {
            float fSpeed = m_rMoveControl.CurrentSpeed;
            if (m_rAnimator != null) {
                m_rAnimator.SetFloat("Speed", fSpeed);
            }
        }
    }

    private void OnMove(InputAction.CallbackContext context) {
        if (m_rMoveControl == null) {
            return;
        }
        Vector2 value = context.ReadValue<Vector2>();
        m_rMoveControl.Move(value);
    }

    private void OnMoveStop(InputAction.CallbackContext context) {
        if (m_rMoveControl == null) {
            return;
        }
        Vector2 value = context.ReadValue<Vector2>();
        m_rMoveControl.Move(value);
    }
}
動作確認
Unityエディターで再生して、動作確認します。
ユニティちゃんを歩かせることが出来れば成功です。
Input System
Project TCC は、Input System を使用して、入力処理をしています。
Input System について学びたい方は下記の動画が参考になります。
まとめ
Project TCC のキャラクターを歩かせるサンプルを Visual Scripting から C# スクリプトに変換して動かしてみました。
ユーザーからの入力は、Input System を使用して処理しています。
まずは、Input System とはどういうものか理解してから先に進むといいと思います。

コメント