Unity の Project TCC を触って、Unity の機能を学んでいきましょう。
Project TCC で遊ぼう~UC-01-04 Move and DoubleJump: 二段ジャンプさせる~
UC-01-04 Move and DoubleJump
変更点の確認
UC-01-04_Move_and_DoubleJump シーンを開きます。
Unityエディター上で再生して、ユニティちゃんを二段ジャンプさせてみましょう。
UC-01-03_Move_and_Jump シーンと違うところは、Player オブジェクトの Script Machine に DoubleJump の処理が追加されています。
Space キーを押すと、ジャンプします。そして、空中にいる間にもう一度 Space キーを押すと、二段ジャンプします。
シーンの複製
UC-01-03_Move_and_Jump_Copy シーンを複製して、UC-01-04_Move_and_DoubleJump_Copy という名前にします。
Input Action Asset の設定
今回は Input Action Asset の設定は必要ありません。
Space キーを押すと、Jump の処理が実行されます。
Animator の設定
Player オブジェクトの Animator コンポーネントの Controller に UC-01-04_Move_and_DoubleJump を設定します。

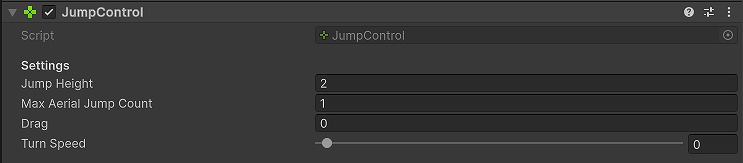
JumpControl の設定
Player オブジェクトの JumpControl コンポーネントの Max Aerial Jump Count を 1 に設定します。
ジャンプ中にもう1回ジャンプできるようになります。
C# スクリプトの作成
Player オブジェクトにくっ付いている MyWalkTest にプログラムを追加していきます。
MyWalkTest の内容はこちらになります。
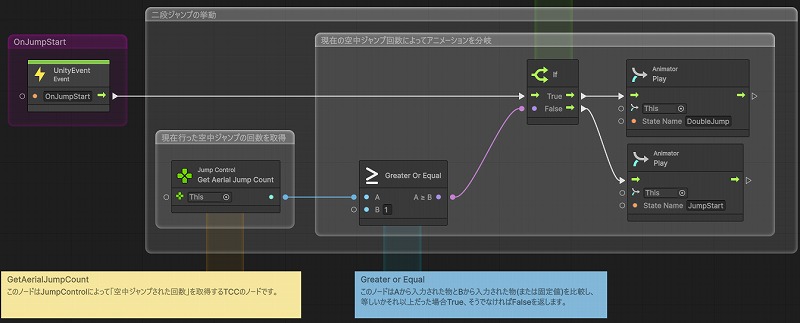
前回から OnJumpStart() の処理が変更になっています。
    private void OnJumpStart() {
        if (m_rAnimator != null && m_rJumpControl != null) {
            if (m_rJumpControl.AerialJumpCount >= 1) {
                m_rAnimator.Play("DoubleJump");
            }
            else {
                m_rAnimator.Play("JumpStart");
            }
        }
    }
動作確認
Unityエディターで再生して、動作確認します。
ユニティちゃんを二段ジャンプさせることが出来れば成功です。
まとめ
Project TCC のキャラクターを二段ジャンプさせるサンプルを Visual Scripting から C# スクリプトに変換して動かしてみました。
JumpControlコンポーネントの設定を変更して二段ジャンプさせることが出来ます。
コメント