Unity の Project TCC を触って、Unity の機能を学んでいきましょう。
Project TCC で遊ぼう~UC-03-08 Wall Jump: 壁に張り付き、更にジャンプできるようにします~
UC-03-08 Wall Jump
変更点の確認
UC-03-08_WallJump シーンを開きます。
Unityエディター上で再生して、ユニティちゃんを動かしてみましょう。
UC-03-07_AerialKick シーンと違うところは、Player オブジェクトの Script Machine に WallHang が追加されています。空中にいるときに、壁に張り付き状態になれます。
シーンの複製
UC-03-07_AerialKick シーンを複製して、UC-03-08_WallJump_Copy という名前にします。
Level の複製
UC-03-08_WallJump_Copy シーンの Level オブジェクト(子オブジェクトも含む)を削除します。
UC-03-08_WallJump シーンの Level オブジェクトをコピー(Ctrl + C)して、UC-03-08_WallJump_Copy シーンに貼り付け(Ctrl + V)ます。
System の複製
UC-03-08_WallJump_Copy シーンの Main Camera、CameraController、VirtualCamera、System オブジェクト(子オブジェクトも含む)を削除します。
UC-03-08_WallJump シーンの System オブジェクトをコピー(Ctrl + C)して、UC-03-08_WallJump_Copy シーンに貼り付け(Ctrl + V)ます。
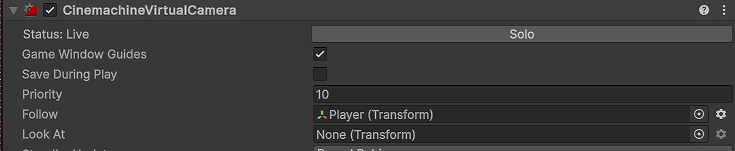
System/VirtualCamera オブジェクトの CinemachineVirtualCamera コンポーネントの Follow に Player オブジェクトを設定します。
アバターの設定
Player オブジェクトの見た目を変更します。
Player オブジェクトの子オブジェクトの UnitychanRFN_STD オブジェクトを削除します。
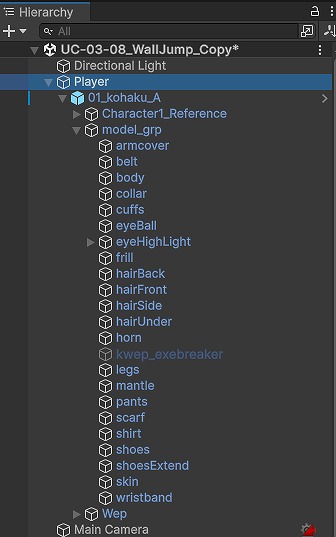
Assets/TCC/Contents/Characters/UnityChanTPK/Models/01_kohaku_A/Prefabs/01_kohaku_A プレハブを Player オブジェクトのところまで持っていき、ドラッグ&ドロップします。
ヒエラルキーの Player/01_kohaku_A/model_grp/kwep_exebreaker オブジェクトを選択し、インスペクターのチェックを外して無効にします。
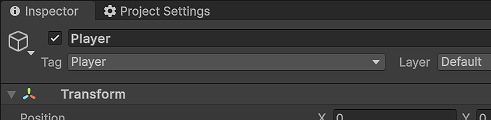
Player タグの設定
Player オブジェクトの Tag に Player を設定します。
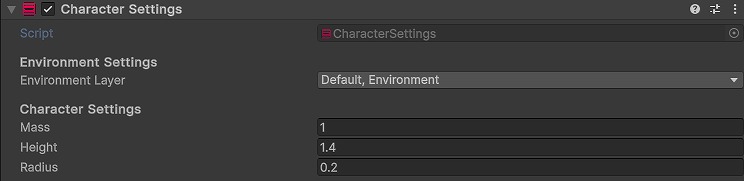
CharacterSettings の設定
Player オブジェクトの CharacterSettings コンポーネントの EnvironmentLayer に Default を追加します。
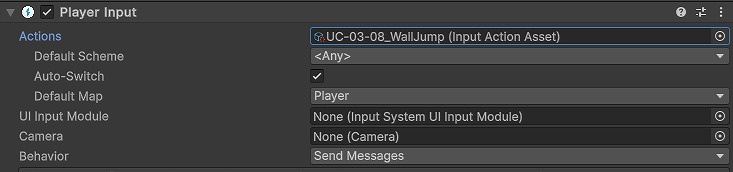
PlayerInput の設定
Player オブジェクトの PlayerInput コンポーネントの Actions に Assets/TCC/Scenes/03_Action/Data_UC-03-08_WallJump/UC-03-08_WallJump を設定します。
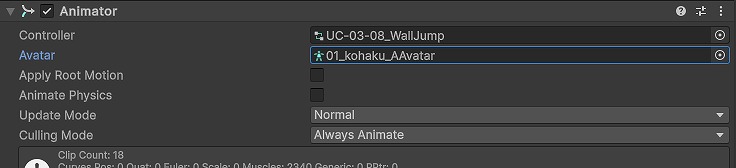
Animator の設定
Player オブジェクトの Animator コンポーネントの Controller に Assets/TCC/Scenes/03_Action/Data_UC-03-08_WallJump/UC-03-08_WallJump を設定します。
Player オブジェクトの Animator コンポーネントの Avatar に Assets/TCC/Contents/Characters/UnityChanTPK/Models/01_kohaku_A/01_kohaku_AAvatar を設定します。
WallCheck の追加
Player オブジェクトに WallCheck コンポーネントを追加します。

AnimatorMoveControl の追加
Player オブジェクトに AnimatorMoveControl コンポーネントを追加します。

ScriptMachine の編集
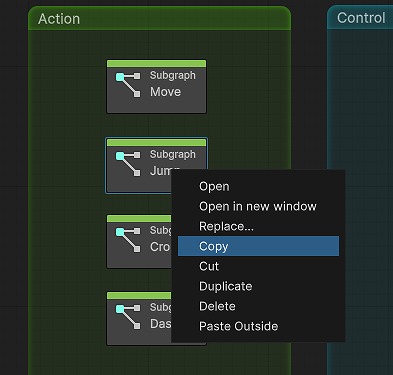
UC-03-08_WallJump_Copy シーンの Player オブジェクトについている ScriptMachine の Jump を削除します。UC-03-08_WallJump シーンの Player オブジェクトについている ScriptMachine の Jump をコピーします。
UC-03-08_WallJump_Copy シーンの Player オブジェクトについている ScriptMachine にペーストします。
JumpControl の設定
Player オブジェクトの JumpControl コンポーネントの OnJump に OnJump イベントを設定します。

MyPlayer_03_08 の作成
MyPlayer_03_08 スクリプトを新規作成して、Player オブジェクトに追加します。
MyPlayer_03_08 スクリプトの内容はこちらになります。
using Unity.TinyCharacterController.Brain;
using Unity.TinyCharacterController.Check;
using Unity.TinyCharacterController.Control;
using Unity.TinyCharacterController.Effect;
using UnityEngine;
public class MyPlayer_03_08 : MonoBehaviour {
private WallCheck m_rWallCheck;
private GroundCheck m_rGroundCheck;
private Gravity m_rGravity;
private Animator m_rAnimator;
private JumpControl m_rJumpControl;
private CharacterBrain m_rCharacterBrain;
private void Awake() {
TryGetComponent<WallCheck>(out m_rWallCheck);
TryGetComponent<GroundCheck>(out m_rGroundCheck);
TryGetComponent<Gravity>(out m_rGravity);
TryGetComponent<Animator>(out m_rAnimator);
TryGetComponent<JumpControl>(out m_rJumpControl);
TryGetComponent<CharacterBrain>(out m_rCharacterBrain);
}
private void Update() {
if (m_rWallCheck == null) {
return;
}
if (m_rGroundCheck == null) {
return;
}
if (m_rGravity == null) {
return;
}
if (m_rAnimator == null) {
return;
}
if (m_rJumpControl == null) {
return;
}
if (m_rCharacterBrain == null) {
return;
}
bool bIsContact = m_rWallCheck.IsContact;
bool bIsOnGround = m_rGroundCheck.IsOnGround;
float fFallSpeed = m_rGravity.FallSpeed;
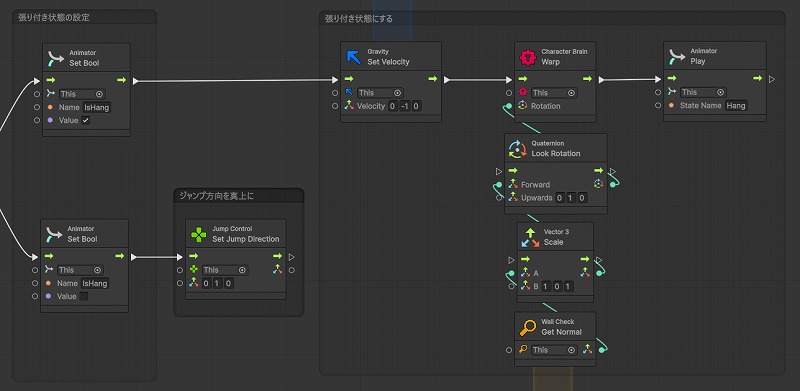
if (bIsContact && !bIsOnGround && (fFallSpeed < 0)) {
m_rAnimator.SetBool("IsHang", true);
m_rGravity.SetVelocity(Vector3.down);
Vector3 rNormal = m_rWallCheck.Normal;
Vector3 rForward = Vector3.Scale(rNormal, new Vector3(1f, 0f, 1f));
Quaternion rRotation = Quaternion.LookRotation(rForward, Vector3.up);
m_rCharacterBrain.Warp(rRotation);
m_rAnimator.Play("Hang");
}
else {
m_rAnimator.SetBool("IsHang", false);
m_rJumpControl.JumpDirection = Vector3.up;
}
}
}動作確認
Unityエディターで再生して、動作確認します。
空中にいるときに、壁に張り付き状態になれます。
さらに、Space キーを押すと、壁ジャンプできます。
まとめ
Project TCC のキャラクターが空中にいるときに壁に張り付き状態になるサンプルを Visual Scripting から C# スクリプトに変換して動かしてみました。
壁ジャンプで上に登っていくアクションができるようになりました。
コメント